Showing posts with label JK/SK. Show all posts

Thursday, April 15, 2010

Three Part Lesson in Geometry: Make a House

Here's the three-part lesson Moses taught during our visit.

Part 1:  Students learned the names of several polygons in his classroom (quadrilateral, triangle etc.) in the beginning of the year.  To activate this prior learning, Moses used the I-Spy strategy to get students to find certain polygons on this poster.  

I spy a shape that has 4 sides and 4 vertices.  

Once up in front of the class, students were asked to show how they knew the shape had 4 sides and 4 vertices (tracing and pointing).  Moses labelled the shape on the poster.

This process was repeated several times.


Part 2: Moses introduced the problem to the class. Using cut-outs of pattern blocks, he asked students to make a house.  Students work in small groups at the make it centre.

Moses was looking how students combined different pattern blocks to form the new shape (house).  His anecdotal notes were based on this.


Here are some samples of student work. 


Most students were at this stage. 

Some were beginning to combine certain shapes in an intentional way:


Then there's our friend Hans, who always thinks outside the box:


Part 3: Moses gathered students on the carpet and laid out all the student samples.


Students were asked to find two houses that were the same.  Once a student found two samples, Moses asked them to explain how they are the same.


This student is explaining that they are the same because there's a hexagon between two triangles.

Students did not notice that shapes were combined together to form new shapes so Moses ended the lesson.  He knows where his teaching needs to focus: get students to the shape composer stage.

This lesson is based on a three part lesson in the Guide to Effective Instruction in Mathematics K-3: Geometry.  You can find the entire lesson and others at http://eworkshop.on.ca/.


Word Wall

Here's the word wall Moses uses:


Take a look at the post in Nancy's link to see how the word wall in her classroom is organized.

The Surprise Garden Unit: Patterning Book

Moses used this book to introduce students to different types of repeating patterns.


Students were able to transfer what they learned in the caterpillar lesson to the book by identify the type of pattern (e.g., (AB, ABB) on each page.


States of Matter Exploration

Moses really wanted his students to learn inquiry skills.  This lesson allowed them to do that!

Part 1: He brought in ice cubes and asked: What are some things we can do with this ice cube?

Students responded with:
- look at it
- break it
- melt it
- put it in a glass
- hold it
- we can call it a solid

Moses doubled check that it was a solid using the Finger Test achor chart:


Part 2: He introduced the question for exploration:

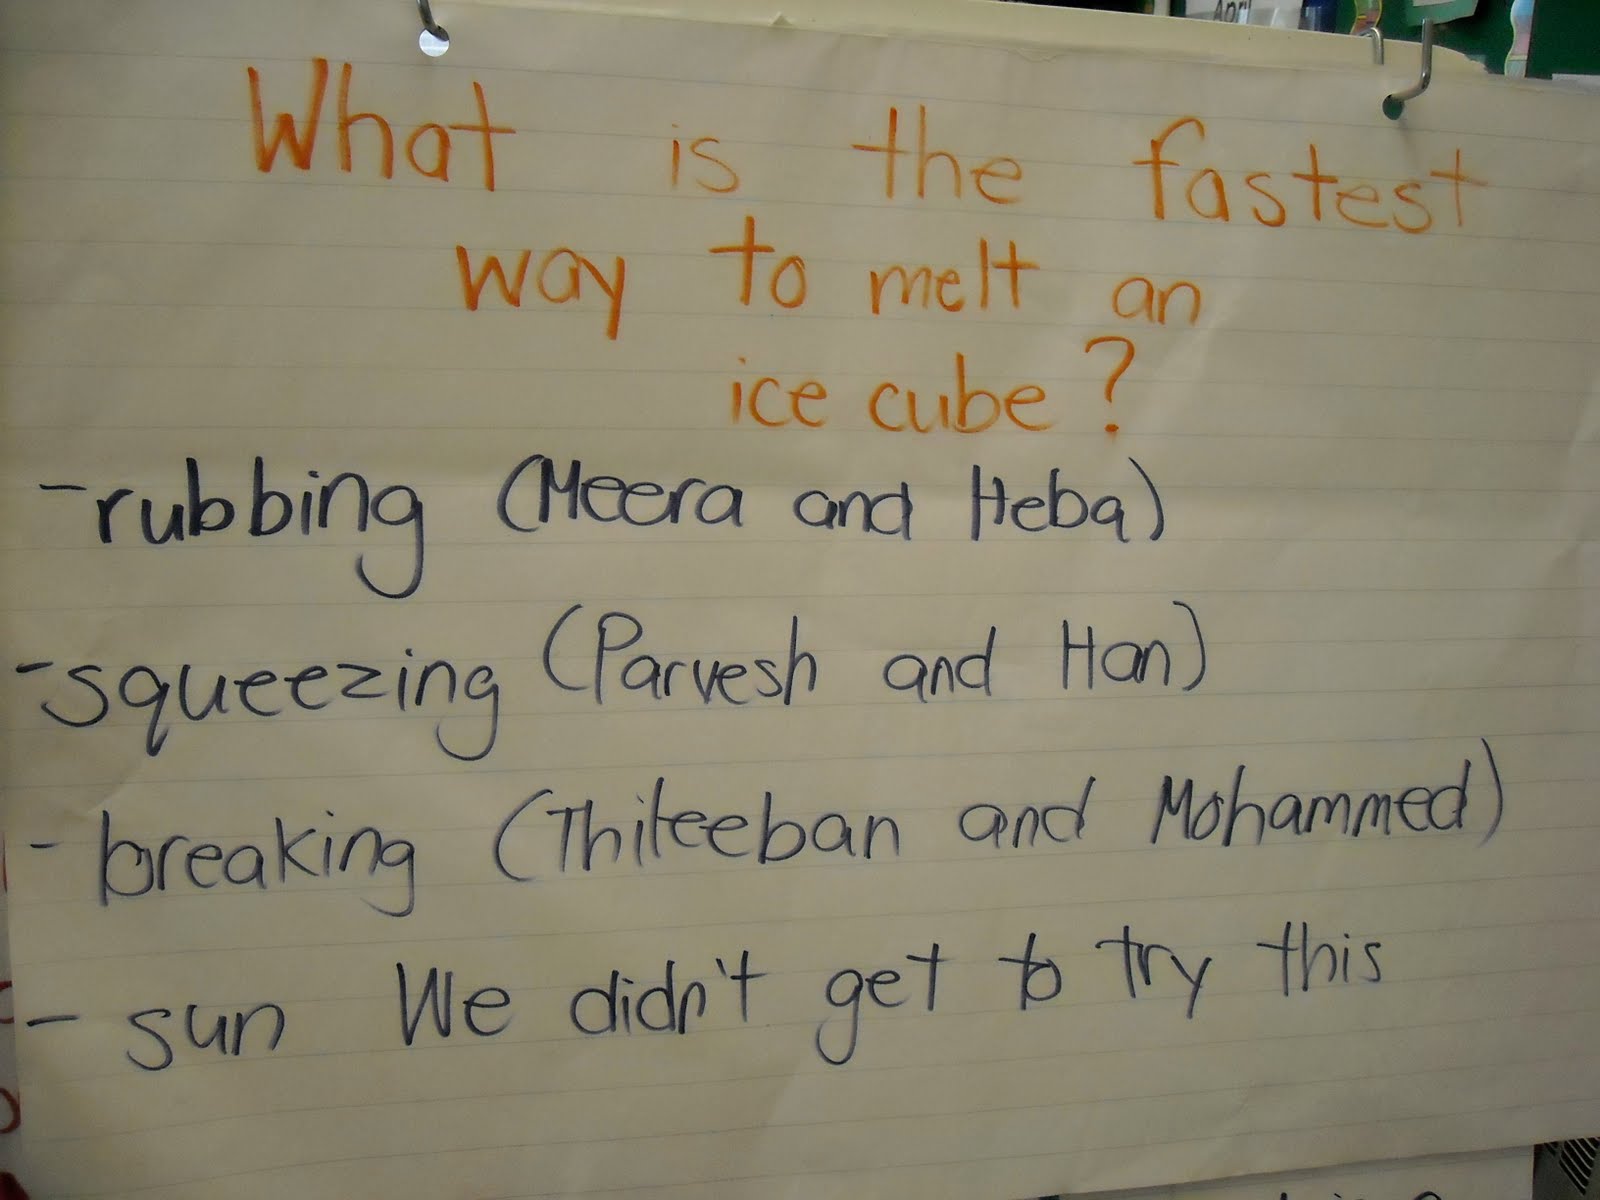
What's the fastest way to melt an ice cube?

Students had to stay inside the classroom and work with a partner.  They had 10 minutes (more like 7 actually but they don't know that!)

Before sending this off, Moses had a pair model to make a plan together and listen to each other's ideas.

Some students tried to take it out of the bag so an annoucement had to be made:

The ice cube must stay in the bag!

What do you predict most students try to do?  You got it!


Most of them tried to hit it again a hard object.  Moses had to remind them to try to 'melt' it!  Some figured out that smaller pieces melt really quickly!


Part 3: Once time was up, students were gathered on the carpet and Moses asked the following questions:

What are some ways you tried to melt the ice cube?


What did you notice happen to the ice cube when it melted?
When you rub your hands together, how does your hand feel? (hot)
What if you squeezed your hand, how do they feel? (hotter)
How do you feel in the sun? (hot)

He ended with this question to get them thinking about the big idea of the lesson:

If you want to melt a solid, what do you have to do?  (make it hotter)


Next Steps: The class will leave a bag of ice cubes by the window in the sun and observe what happens.

The Surprise Garden Unit: Writing

Students were asked to write signs for the garden at the writing centre.  These were done independently.


The Surprise Garden Unit: Fence Patterns

After students learned what a pattern core is, they did this activity.  They had to identify the pattern core first.  That's the sheet at the bottom with the child's name beside it.  Finally, they coloured in the fence to match the core.


The majority of the patterns were AB patterns.

There were some AAB patterns.


Then there was this:

If you look at the other posts about patterns, you'll notice that this was not a one-hit-wonder for our friend Hans (a JK student!).

The fence patterns were then displayed around the perimeter of the bulletin board.

The Surprise Garden Unit: Flower Patterns

Prior to this lesson, students had many experiences identifying the pattern core and creating repeating patterns.  Moses really wanted to get into the big idea that patterns never end but continue on.

Once at the math centre,  students were asked to identify the core they were going to make the pattern.   Afterwards, they created the circular pattern.  As a follow-up, Moses got students to create flowers.

Here's what he did:

The black dot is a child's face.

These flowers are displayed on the top of the 'Surprise Garden' bulletin board.


Take a look at the other posts for the caterpillar and fence pattern activities.

Monday, March 29, 2010

Music Files

Hi Everyone,
Thanks everyone for coming...I had a great time meeting you (or re-meeting for some).

Here is a link to folder where I've posted my favourite kindergarten songs I do with my class. They are in MP3 format so feel free to download and create your own CD. If you have internet access in your classrooms you can even play the song right from the link itself.

Enjoy!
http://www.box.net/shared/dom4ob7rev

Three Part Lesson: Caterpillar Patterns for the Surprise Garden

Moses had been teaching patterning to his students prior to our visit.  Students were familiar with repeating patterns, the pattern core, and how to create patterns.  Here are the pictures from each part of the lesson.

Part 1: Get students ready for the problem by activating prior knowledge.

This is a poster from the Nelson Kindergarten program.  Moses asked students to find a pattern in the poster and identify the pattern core.  He recorded the core on the sticky note.


Part 2: Introduce the problem and get students to solve it.


Moses reminded them of the different animals they read about in the book.  He told them they were going to make caterpillars to go on their bulletin board.  After modelling how to colour the caterpillar with the two colours, students created their own caterpillar pattern independently.  Students used several different cores in their pattern.  We (visitors) were concerned that students would just do what Moses modelled but that was not the case!
Part 3: Share different thinking and look for big ideas (what did we learn from doing this?)


First, Moses placed all the caterpillars on the bulletin board.  Then he asked students to find ones that were the same.  This child is explaining why these two samples belong together (they have the same green-purple core).


As students continue to find pairs of caterpillars that were similar, Moses noticed that some pairs were the same.  This student is explaining how the first pair (the one he's pointing to) is similar to the pair closest to Moses (they have the same green-purple-green-purple core).


Once Moses got enough samples for each type of core, he began his explicit teaching about pattern cores.


Next Steps
There were several samples that were incomplete.  Moses plans on asking students to predict which colour is next based on the core.


This lesson is based on ' Colourful Caterpillars' in the Guide to Effective Instruction in Mathematics: Patterning and Algebra.  You can find electronic copies of all the guides at
http://www.eworkshop.on.ca/.  There are online videos of lessons too!

Wednesday, March 24, 2010

Word Wall

The most effective word walls are those that are interactive.  The words should be at eye level and students should be able to 'take' the words to their writing area.  Here's how Nancy does it in her classroom.  Seeing the kids actually use it is awesome!


Do you have a word wall in your classroom?  If yes, how do students use it?

Daily Writing

One of the many ways Nancy gets her students to write is her sign-in system every day.  Notice how she differentiates the sheets for Martina and Hrushi.  Other students simply print their names.


How do you get students to write?