Showing posts with label Grade 1. Show all posts

Sunday, March 6, 2011

Co-Teaching Lesson: Measurement (Shelley)

Here is a summary of the Grade 1 Measurement lesson we observed during our co-teaching session at Donwood Park JPS.  Thank you, Shelley, for being our demonstration lesson teacher!
3-Part lesson plan and Assessment for Learning tool

Prior Learning:
This was the first measurement lesson in Shelley's class.  It served as a diagnostic task to inform her teaching during the measurement unit.


Part 1: Getting Started:
Shelley told students that she wondered who had the longest shoe in the class.  Several students shared their prediction.  

She then asked the class: How can we find out for sure who has the longest shoe in our class?  As students shared, she recorded their ideas on chart paper.


Part 2: Working on It
Shelley introduced the problem to the class.

She asked the class: What does the word justify mean?  After they discussed this word, the class agreed that it means 'prove that you are right".

Shelley then asked: What are math tools you can use to solve this problem?  She recorded their ideas on chart paper as students shared.  This chart serves as a anchor for students when they want to spell certain words etc.


Classroom Management:
Shelley placed chart paper, markers, and all the math tools on desks to ensure a smooth transition into the problem solving.  She didn't want to leave it all out on one table for students to choose because she felt that this would create chaos!

We observed several strategies and misconceptions while students solved the problem:

Some students confused length with perimeter.
Some students directly compared their shoes.  But they struggled with recording the justification.
This group all directly compared their shoe but one student insisted that his shoe was the longest and 'doctored' the recording to match his answer.  
This group chose the same unit to measure each shoe print.  They did not pay attention to the Popsicle sticks not fitting accurately.
Part 3: Reflecting and Connecting
Gallery Walk
Shelley wanted to highlight all the different ways the class approached the problem.  So she decided to use the gallery walk consolidation strategy.  All student work was left on top on desks.  Groups rotated around to look at the different strategies.  As students looked at each other's work, Shelley asked them to talk about how their work was the same and how it was different.


Math Congress
After students were able to see every one's work, Shelley asked two groups to share their with the whole group.  The intent of the math congress is to bring out key ideas and clarify misconceptions.


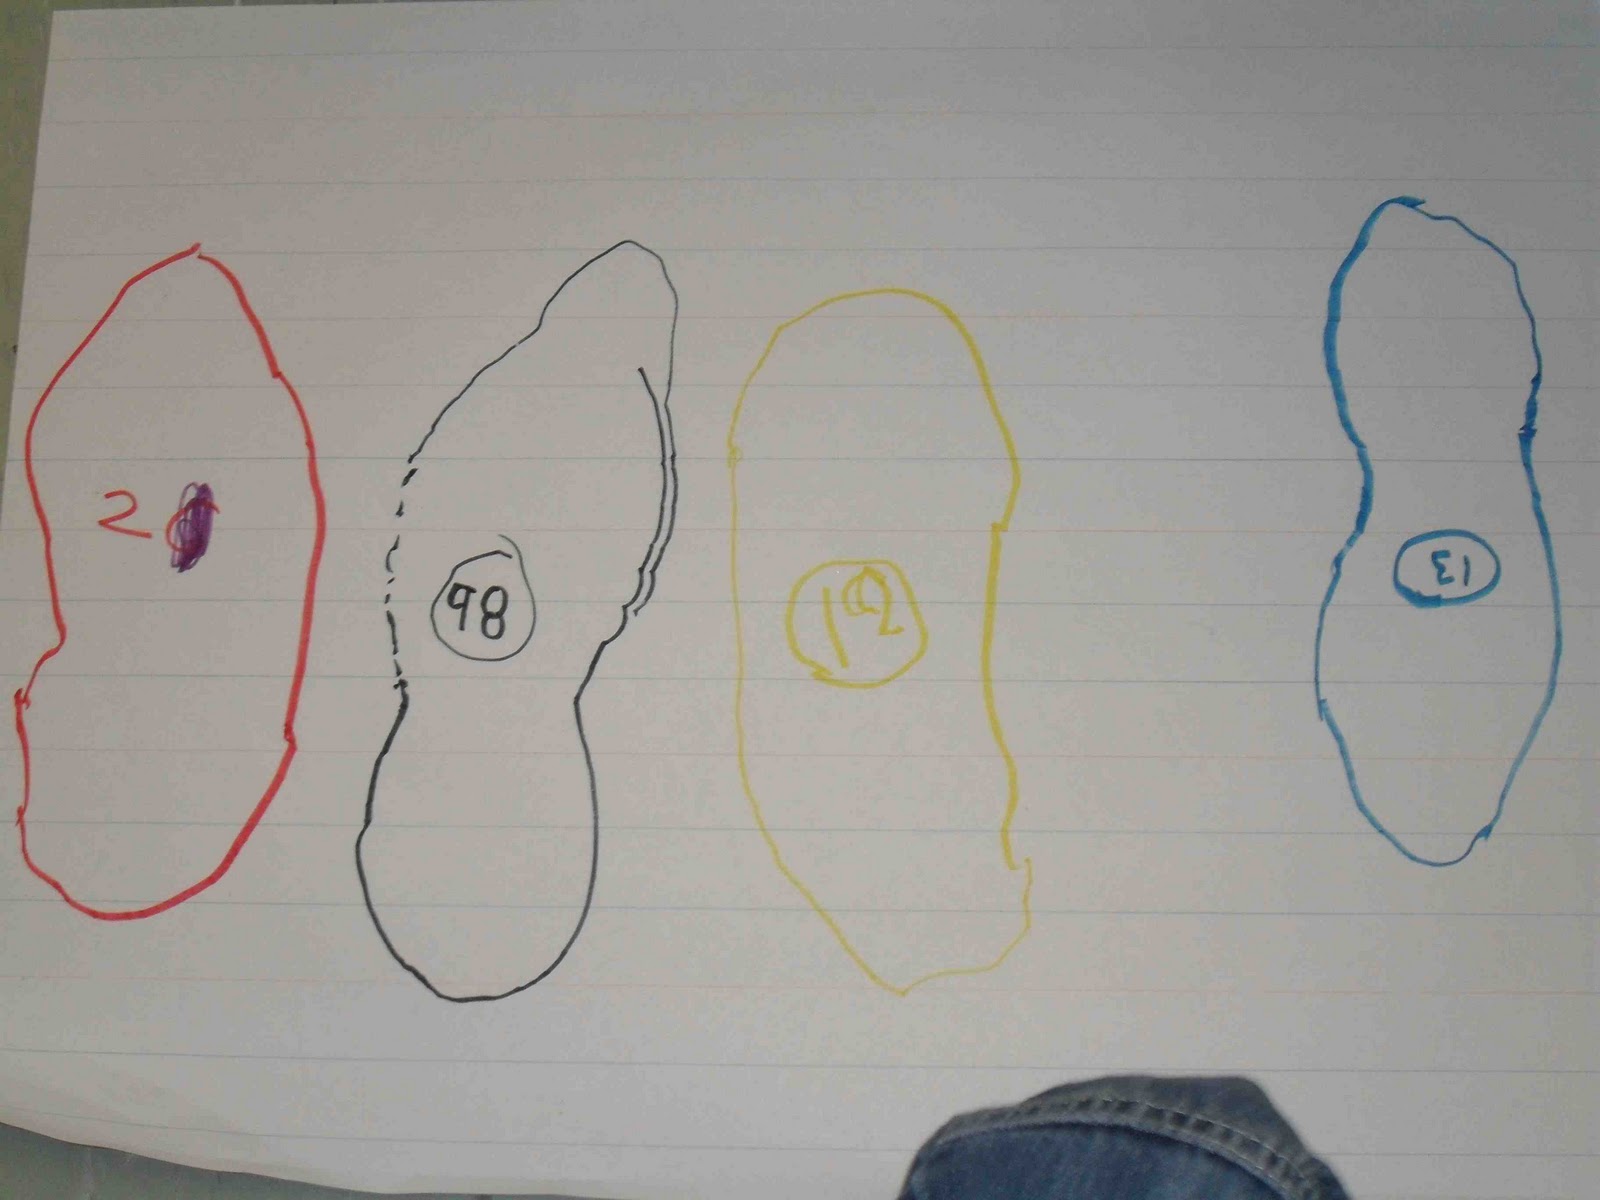
This group just looked inside their shoe for sizes.  Shelley asked them to prove that size 98 was actually the longest.
They decided to try to the straw to measure the lengths.  Shelley asked them to share with the whole class why this was the best math tool to measure how long each shoe print out.  
Shelley used this example to clarify any misconceptions about tools spilling out of the shape etc.
Shelley did not plan on letting students use the ruler but let them do so when they requested it.  As this group shared, it became obvious that they knew how to use the ruler appropriately.
Part 3: Explicit Teaching
After the selected groups shared, Shelley summarized the key points of the lesson:
- the length if the longest part of the shoe, not around it
- the best math tool to use is the one that doesn't go over the shape
- you have to use the same tool to measure all the shoes before you can decide which one is the longest

Shelley plans on spending more time clarifying these points tomorrow before moving on to the next problem.

Raman and Tsedale taught a similar lesson to Shellye's Grade 1 class.  Check out that post to compare student work.

Co-Teaching Lesson: Measuring Length (Queeny/Jayne)

Here is a summary of the Grade 1 Measurement lesson we observed during our co-teaching session at Bendale JPS.  Thank you, Queeny and Jayne, for being our co-teachers!

Three-Part Lesson Plan and Assessment for Learning Tool

This lesson is a modified version of the Grade 1 Measurement lesson in the Guide to Effective Instruction in Mathematics: Measurement K-3 (page 75).

Prior Learning:
Students in Jayne's class had many experiences measuring objects using non-standard using a variety of tools.


However, this was the first problem solving lesson in Jayne's measurement unit.

Both Jayne and Queeny's class had just completed a unit on snakes as well.

Part 1: Getting Started
Queeny started a discussion with students with the following question: What do you remember about snakes?


After some discussion, Queeny placed these snakes on the carpet and asked students: Which snake do you think is longer?

She then asked: How can we find out which one is longer?  She recorded student ideas on chart paper.


Part 2: Working on It
Jayne introduced the problem to the whole class:

She read over the problem with the whole class.  Then she asked: What does JUSTIFY mean?  The class discussed this word and came up with "justify means prove what you did"


A variety of tools were available for students to choose from.

There were several strategies and misconceptions we observed while student worked through the problem:
Inappropriate choice of unit.
Inappropriate choice or unit, spaces between unit etc.
Part 3: Reflecting and Connecting (Consolidation)
Gallery Walk
Jayne and Queeny used a gallery walk to get students to see the different ways other pairs solved the problem.  Every one's work was laid out on the desks and pairs went around the room looking at other people's thinking.  This strategy allows every one's work to be seen.

Math Congress
This consolidation strategy is more than a group share.  During the Part 2 of the lesson, Jayne and Queeny noticed every pair chose the same tool to measure all three snakes.  However, many did not select an appropriate tool. So, they strategically selected a few students to bring their work to the carpet and share with the whole class to address this key concept.
This group was asked to share because they cut up the pipe cleaners to fit the snakes.  Questions Jayne and Queeny asked were:  Are the pipe cleaners the same size?  When counting how many, is it still 1 or just part of it?
This pair was asked to share because many other pairs used the cubes.  Jayne and Queeny's questions dealt with the cubes spilling out.
This pair was selected to share because they chose the most appropriate unit to measure the snakes.  Jayne and Queeny's question to them was: Why were the little cubes perfect?


Part 3: Explicit Teaching
After the sharing, Queeny brought out the big ideas of the lesson asking:
Why did all the groups use the same math tool to measure the three snakes?
Why was this important?


She then held up a straw, link it, and a centicube and asked:
Which one was the best tool to measure the snakes?

Tuesday, April 20, 2010

How Full is Your Bucket?


Sharon used this book to get students writing.


Sharon has an anchor chart with an explanation of how to add to other people's buckets.


She has an individual bucket for each student, with a picture on the front.  Students and Sharon write notes and place it in the bucket of someone else.


Thursday, April 15, 2010

Literacy Work Stations: Pocket Chart Station

In the pocket chart station, students sort the pictures into the sequence of the story.  They then match the sentence strip to the picture to retell the story.


Literacy Work Stations: Nursery Rhyme & Poetry Station

In this station, Sharon has a whole bunch of posters of nursery rhymes.  Students have various activities to complete.  This is just one of them.


Literacy Work Stations: Writing Station

Students have been learning about riddles. So the writing station gives them an opportunity to write their own. Sharon has a large bulletin board next to this station so students can pin their riddle up and read others.


Sharon also has prompts at the bottom of the bulletin board for student use.


Literacy Work Stations: ABC Station

Sharon chooses word wall words a week.  Students stamp it, write it, and use it in a sentence.


Literacy Work Stations: Creative Station

The creative station changes often.  In this visit, we saw how Sharon integrated her science unit into it.


Morning Routine: Reading Activities

As students come in, they go to their reading activity.  Sharon really believes this helps them get settled and right into learning, instead of waiting at the carpet or every one reading silently.  In the mornings, they want to talk anyway!


The groupings allows for teamwork and discussion.  Students are able to work cooperatively when they are given many opportunities to develop those skills.

Literacy Work Stations: Organization

Here's how Sharon organizes her stations.  The little picture beside each station creates no doubt who's where.


Students spend about 25 mins at each station.  Then there's a clean up time and rotation to the next station.

Sharon spends time individually with students during this time, either doing running records or guided reading.

All work is stored and sent home eventually.

Literacy Work Stations: Reading Station

In the reading station, students read books.  There's also wordless books in which students write their own story which others can read.